


Introduction
As a beginner, I want to make my own custom toast rather than using any react toast package. The purpose behind making custom toast is initially every beginner should make stuff from scratch, it helps in logic building and it might help you make your own package library in the future.
So in this blog, I will show you how to make toast step by step, bear with me.
Step1: Make a Toast Component and three buttons in app.js
export const Toast = () => {
  return (
    <div >
     This is toast
    </div>
  );
};
Just add toast component in app.js then keep it aside as of now, we will update this component.
<button>warning</button>
<button >success</button>
<button >danger</button>
so we have three buttons in app.js, will make custom toast according to each button.
Step2: Make show toast function/ toastHandler
Take a state from useState hook for toast list which is an array of toasts.
const [toastList, setToastList] = useState([]);

  const toastHandler = (msg, type) => {
    setToastList([...toastList, { id: uuid(), msg: msg, type: type }]);
  };
So we have toastHandler to show the toast in UI, in toastHandler we are just, adding a new id using uuid, message/content, and type ie className for toast container.
Step3: Add this function toastHandler to button, and show toast UI
<button onClick={() => toastHandler("this is warning message", "warning")}>
        warning
</button>

<button onClick={() => toastHandler("this is success message", "success")}>
        success
</button>

<button onClick={() => toastHandler("this is danger", "danger")}>
        danger
 </button>
{toastList.map((item) => (
        <li key={item.id}>
          <Toast
            item={item}
          />
        </li>
      ))}
In the above code snippets, I passed a custom message and className for different toast. and, I just map the toast list array and wrapped the toast component inside the list.
Step 4: update the toast component
  <div className={`toast ${item.type}`}>    //item.type for different toast
      {item.msg}   //item.msg is custom message
    </div>
.toast {
  padding: 1rem;
  width: 500px;
  color: antiquewhite;
  border-radius: 1rem;
  display: flex;
}

.success {
  background-color: green;
}

.danger {
  background-color: red;
}

.warning {
  background-color: yellow;
  color: red;
}
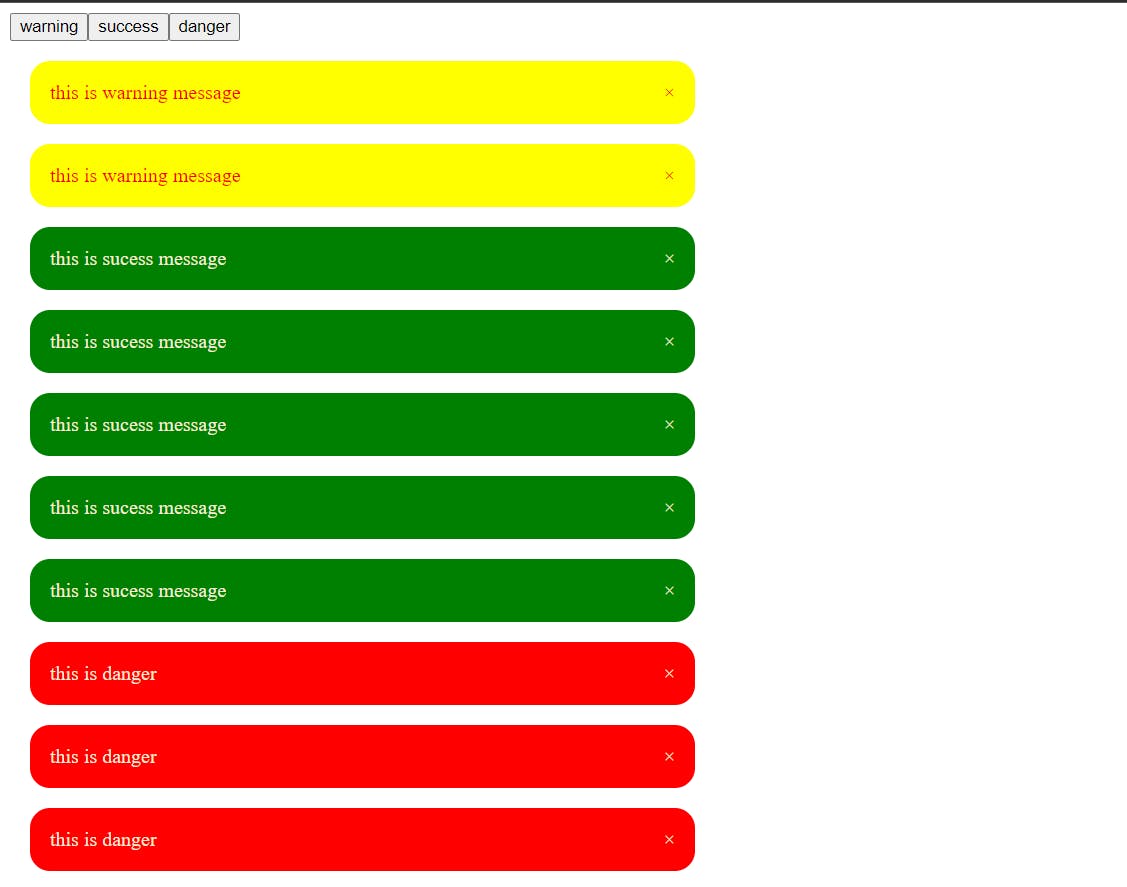
This will be shown like this, here the toast has a remove button also, let's write the logic for removing toast.
Step 5: remove toast from UI
Toast can be removed from the remove button and automatically removed for a certain period of time. So to remove toast we have to make the removeToastHandler function. For this, we need id only which every toast has already. See the below code.
const removeToastHandler = (id) => {
    const updatedToastList = toastList.filter((item) => item.id !== id);
    setToastList(updatedToastList);
  };
And for every toast which removes in some time period, we have to take first a variable autoClose it is basically removed from UI in a given time period and pass it as a prop to our toast component. We will be using useEffect hook to remove this. see the below code.
 useEffect(() => {
    const interval = setInterval(() => {
      if (toastList.length) {
        removeToastHandler(toastList[0]?.id);
      }
    }, autoClose);
    return () => {
      clearInterval(interval);
    };
  }, [toastList, autoClose]);
So this useEffect stored setInterval in the interval variable and it has dependancy array which has first is toastlist and second is autoclose, it keep removing first toast from from the array in given time of autoclose, thats why used setInterval and we have also cleanup the interval, if we do not do it will be keep rerending unnecessary.
Voila! we did it. you see how easy it is. I have given csb link. You can play around it.
I hope you I make you understand well, If you have any query, please do comment. Until then, Keep coding! 🧑💻